
Today I prepared a photo tutorial about how to use your ribbon scraps to make cards or embellishments for your layouts:
- Para comenzar necesitas un suaje, una suajadora, un pedazo de cartoncillo o cartulina( yo usé un color rosa neón porque me lo quiero acabar, venía en un paquete de oferta, es tu oportunidad de deshacerte de los pedazos de cartulina que no te gusten pues quedarán totalmente cubiertos) que cubra el suaje que vayas a utilizar, sobras de listones que combinen, cinta doble cara y unas tijeras.
- To begin you will need a die, a die cut machine, a piece of cardstock ( I used a horrible neon shade of pink, because I just want to finish it, I bought it in a mixed pack at a sale, here is your opportunity to get rid of the cardstock you don't like, because it will be completely covered) that covers the die you want to use, ribbon scraps that look good together, double sided or score tape and scissors.

- Cubre todo el cartoncillo con cinta de doble cara dejando unos centímetros a cada extremo.
- Cover the entire piece of cardstock with double sided tape, leaving a 1.5 to 2 inches extra on both edges.

- Utiliza un doblador de hueso (bone folder)o una tarjeta de crédito o de regalo para quitar todas las burbujas y asegurar que la parte pegajosa de la cinta se adhiera correctamente.
- Use a bone folder or a credit or gift card to get rid of air bubbles and make sure the sticky part adheres correctly.


- Dale la vuelta al cartoncillo y pega las orillas.
- Turn around the cardstock and adhere the ends.

- Cuando quites todo el papel de la cinta, te quedará así:
- When you remove all the paper from the tape it will look like this:

- Empieza a colocar tiras de listones una por una, dejando algunos centímetros en las orillas.
- Start placing ribbons one by one, leaving 1.5-2 inches on each end.


- Cuando cubras por completo el cartoncillo se verá algo así:
- When you have completely covered the cardstock it will look something like this:

- Vuelve a pasar el doblador de hueso (bone folder) o tarjeta de crédito firmemente sobre toda el área para segurarme de que los listones estén bien pegados.
- Once again I pass the bone folder through the whole area, pressing firmly to make sure all ribbons are well adhered.

- Entonces volteó el cartoncillo y pego las puntas de los listones.
- Then I turn the cardstock over and adhere the ribbons ends.

- Una vez terminado se verá así
- Once finished it will look like this:

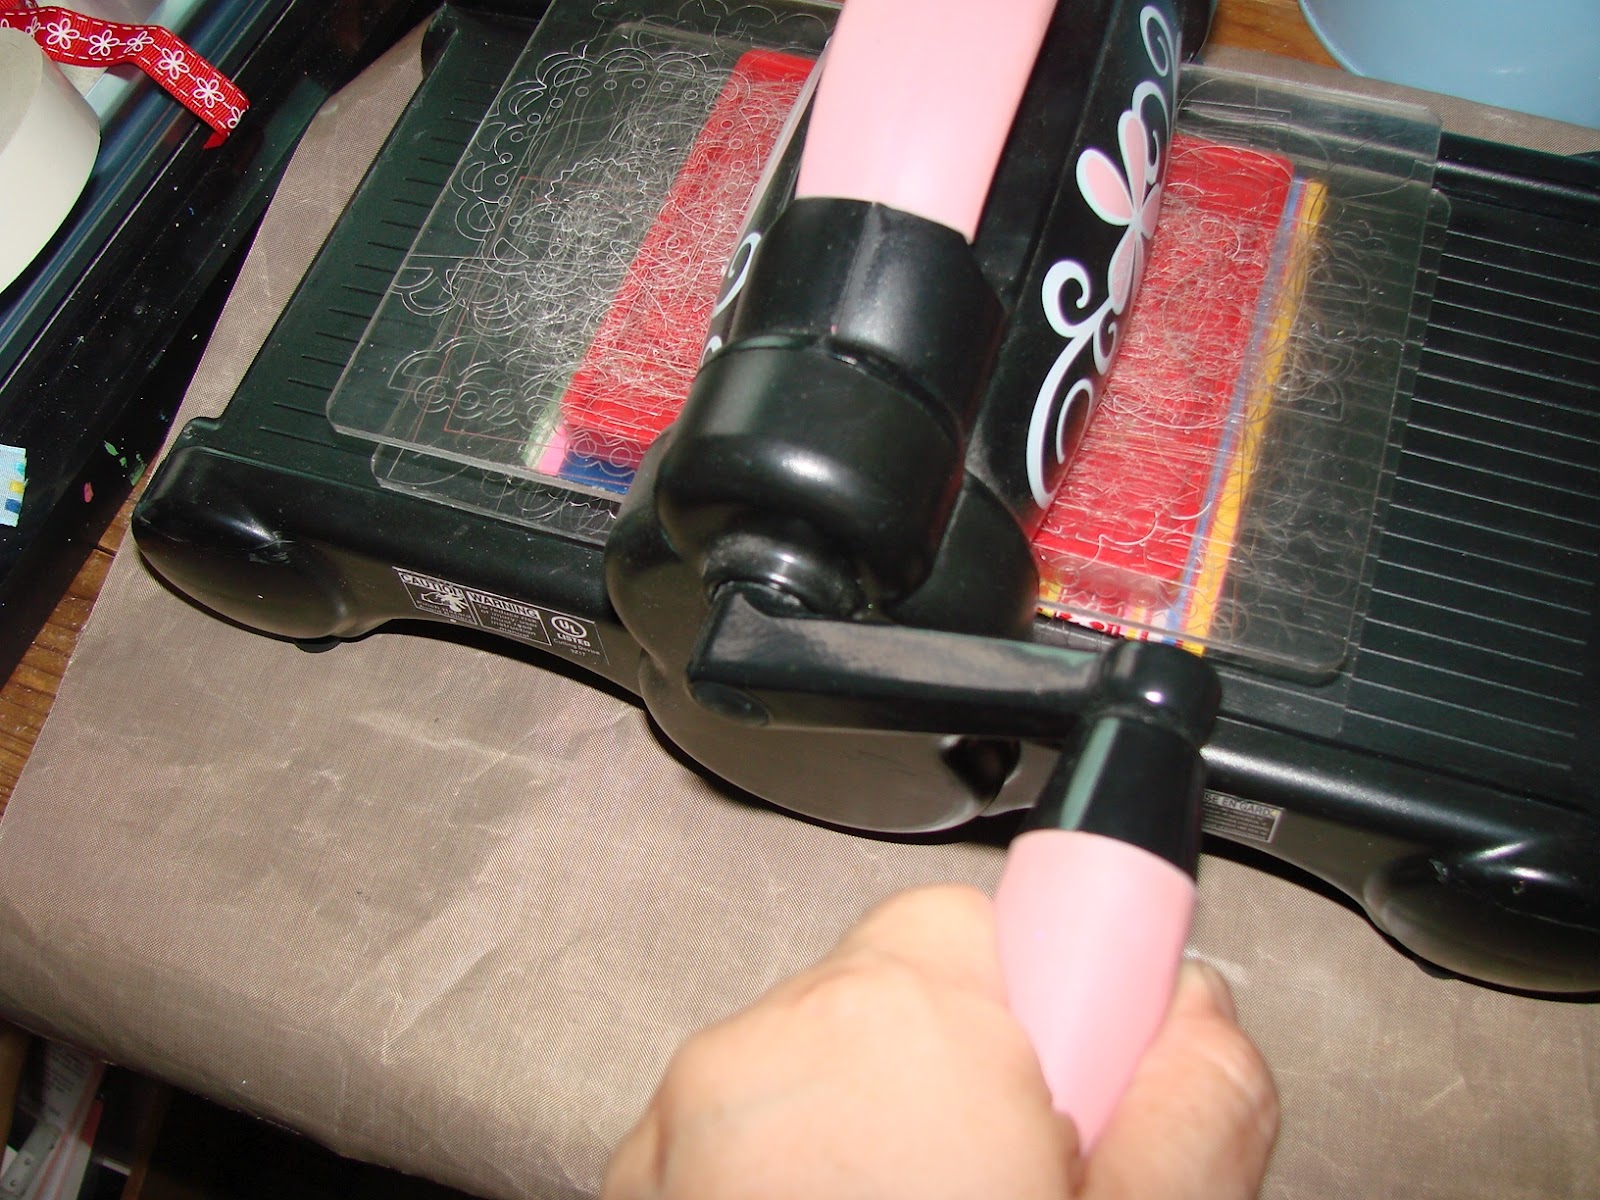
- Coloca tu suajadora con las placas correspondientes al tipo de suaje que vayas a usar, yo te recomiendo suaje Sizzix del grueso pues es más fácil que atraviese todos los listones.
- Put your die cut machine with the corresponding plates for your die, I recommend Sizzix wide or original dies because it is easier to cut through the ribbons.

- Coloqué primero una placa de acrílico, luego mi cartoncillo cubierto de listón, el suaje y por último la otra placa de acrílico.
- I put first one acrylic plaque, then my ribbon covered cardstock, then the die and at last the other acrylic plaque.

- Le dí una pasada por mi suajadora y listo!
- I put it through the die cut machine once and it was ready!
- Terminé con 3 estrellas de diferentes tamaños.
- I ended up with three different sized stars.

- Y una base con las estrellas en negativo, que también puedo utilizar.
- And a base with the negative stars that I can also use.

And here are the two cards I made with the stars and with the base:


3 comentarios:
Beautiful cards and great tutorial, Lucy!
This is such a fun tutorial Lucy! Love how you used up the ribbon scraps! Such a gorgeous card :)
Absolutely STUNNING! Wow... love the blod colors, and your tutorial on the ribbon stars was terrific! Great cards, Lucy! :)
Publicar un comentario
Me encanta saber tu opinión, aprecio tu tiempo y leo cada uno de los comentarios, respondiéndolos la mayoría del tiempo. Muchas gracias!
I love to know your opinion, I apprecciate your time and I read each one,answering them almost all the time. Thanks a lot!